

How To Create A Basic Gantt Chart In Excel

Smartsheet offers a preformatted Gantt chart template, which makes it even easier to visualize your project and prioritize tasks. Automatically calculate duration, adjust task dates with drag-and-drop task bars, and update and share information with key stakeholders to increase visibility and improve project efficiency. Follow the steps below to create the most effective Gantt chart for your project.
1. Navigate to the Smartsheet app at app.smartsheet.com.
2. On the home screen, navigate to the upper left corner of the screen and click the three-lined icon to open the navigation Left Panel.
3. Click on the + icon, which will open up the Solution Center.
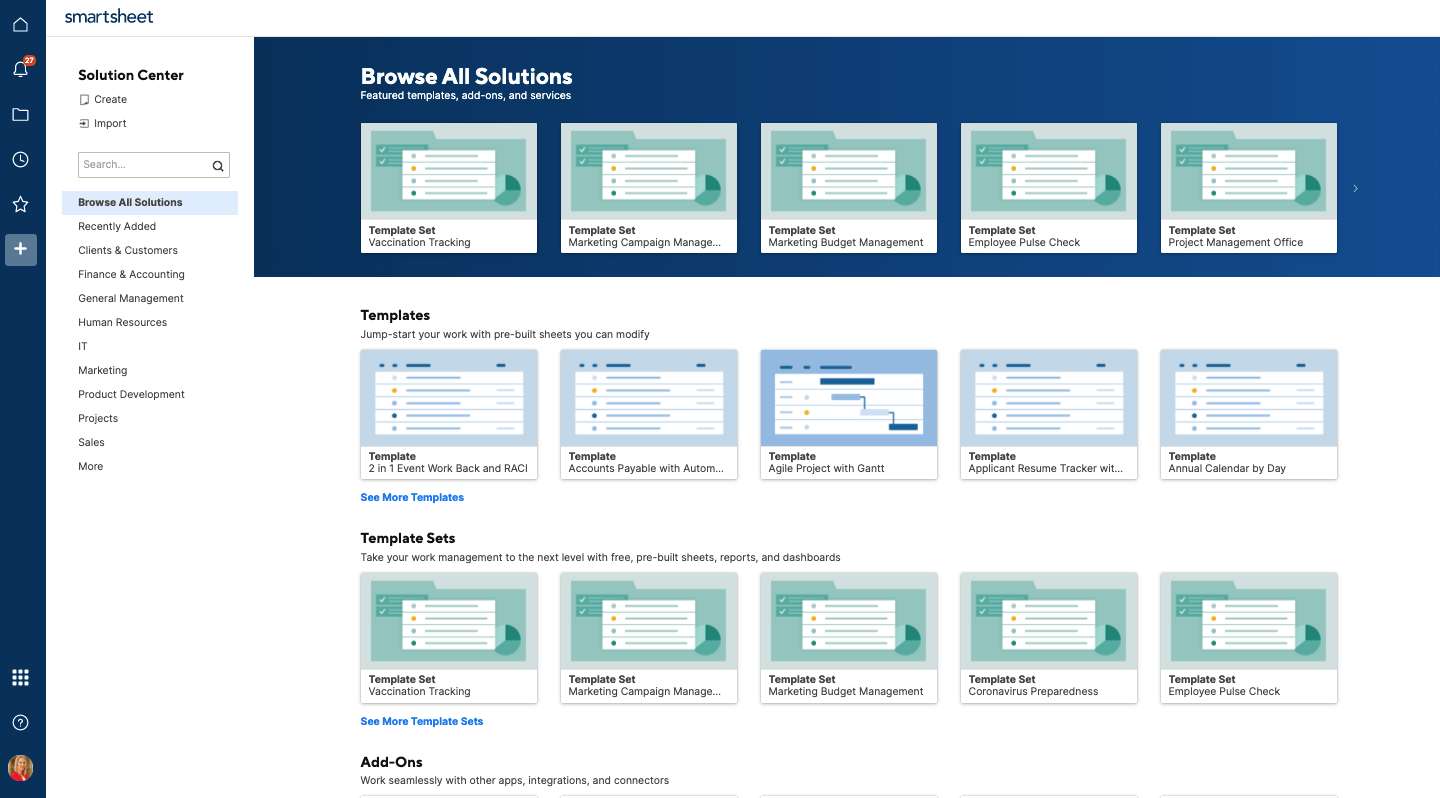
4. On the left side panel, you can choose from a list of Solutions. Click on the Project option. This will open up all of the preformatted templates that already exist in Smartsheet, including the Project with Gantt Timeline template.
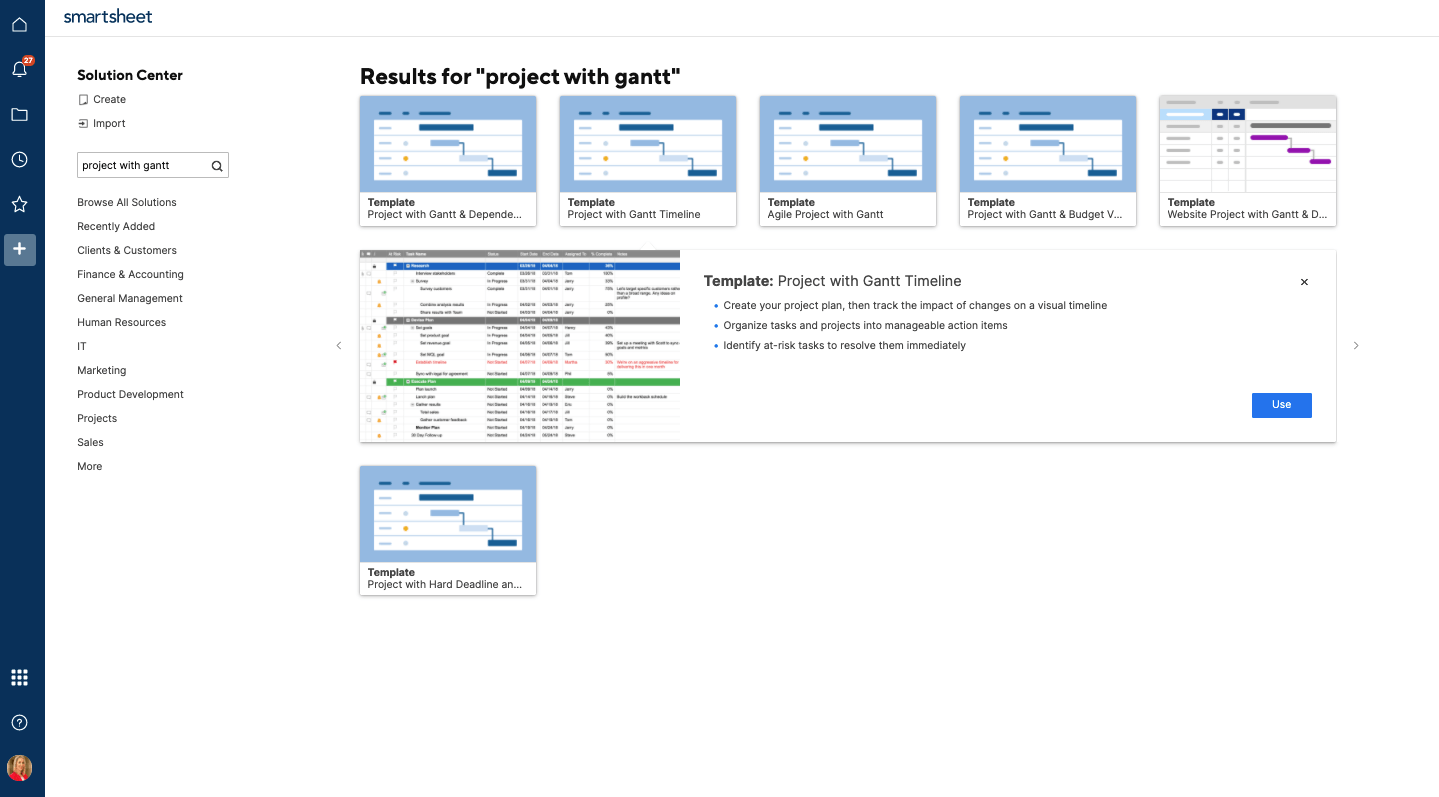
5. Click on the Project with Gantt Timeline template and click Use. The pre-built Gantt chart will open.
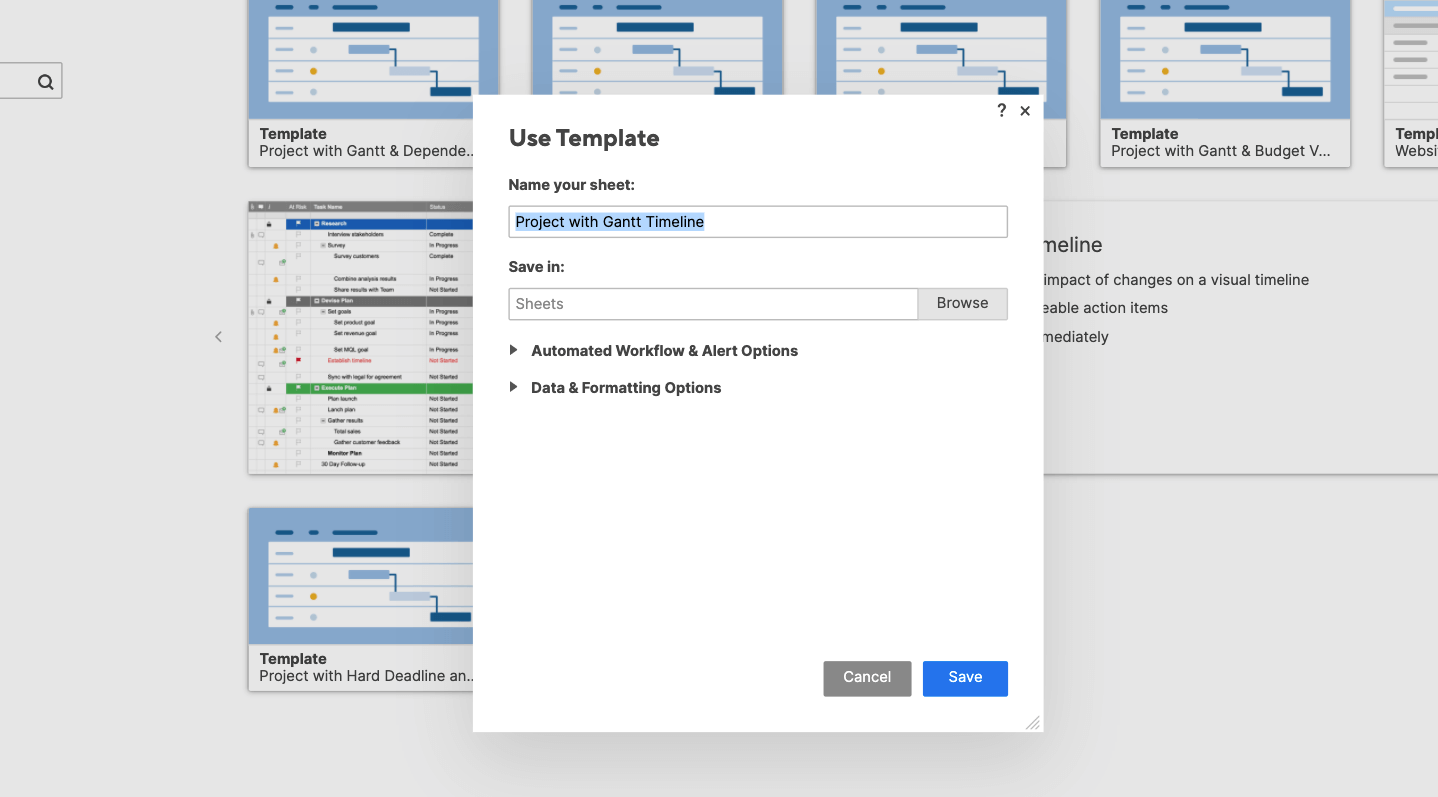
6. Smartsheet will prompt you to name your sheet. Name the chart based on your project and click Save.
7. The new template will open and you can begin editing the preformatted template, based on your project needs.
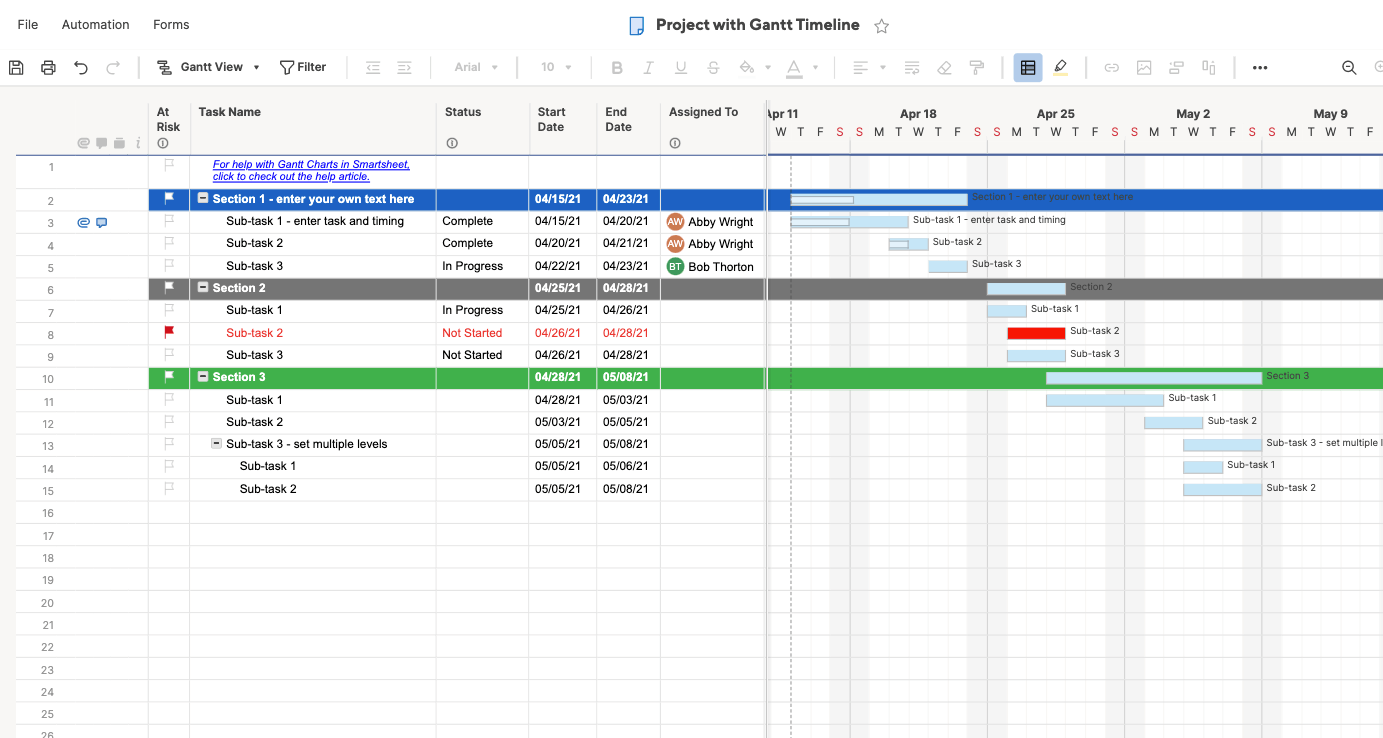
8. From there, you can begin to enter your tasks into the Task Name column.
9. Add start dates and end dates for each task under the Start Date and End Date columns.
10. As you enter the start and end dates, the duration of your tasks will automatically calculate in the chart.
11. As you add tasks, Smartsheet automatically creates your horizontal Gantt bars on the right side of the page. Unlike Excel, there is no need to format anything — Smartsheet will automatically reformat according to the information you input.
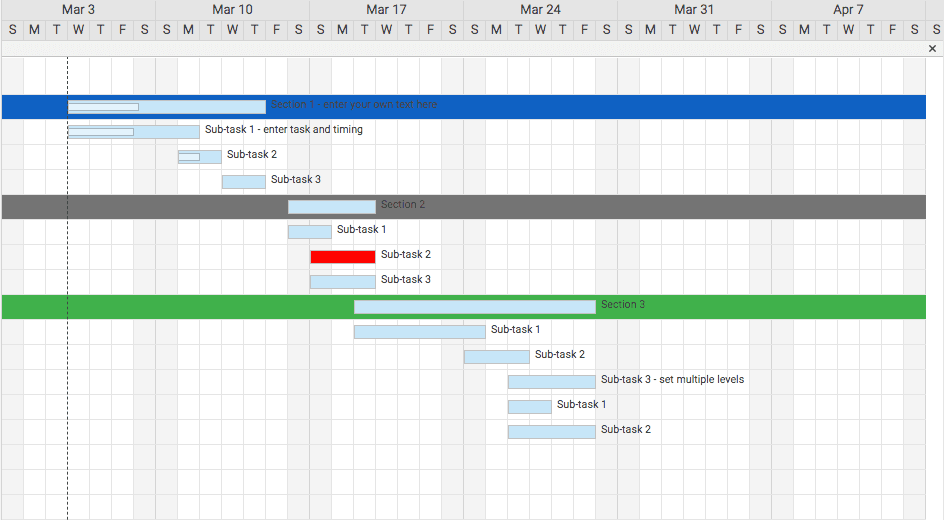
12. If you want to change the dates via the task bars, simply drag either end of the bar, and the corresponding dates and durations in the task table will automatically update.
13. From here, you can also add additional Gantt data directly in the chart, such as dependencies and tasks groups.
14. Switch between Gantt, grid, calendar, and card views by navigating to the top toolbar and clicking on Gantt View dropdown caret.
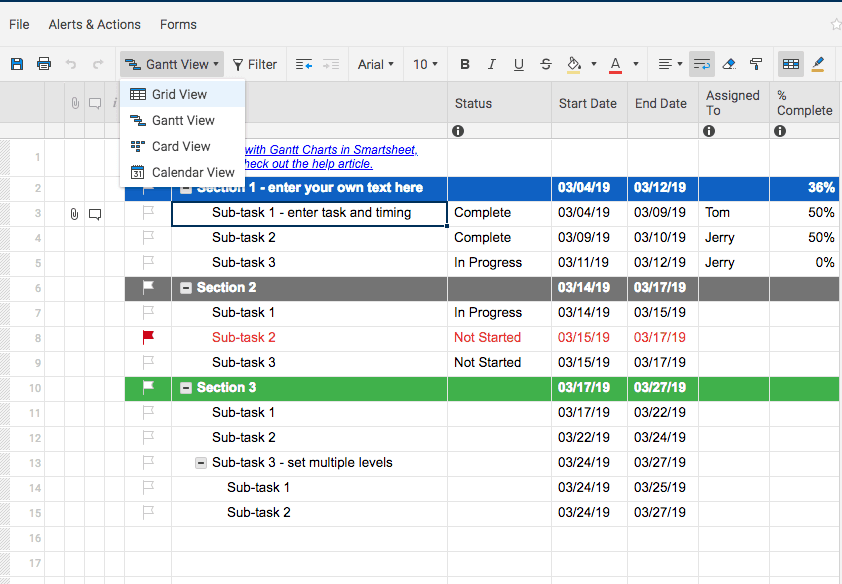
15. A dropdown menu will appear, allowing you to change between the different views.
16. Access and manage your Gantt chart on your mobile device so you can see how your project is progressing at any time, from anywhere.
17. To customize your Gantt chart by changing the colors of your task bars, right click on a task bar and select Color Settings.
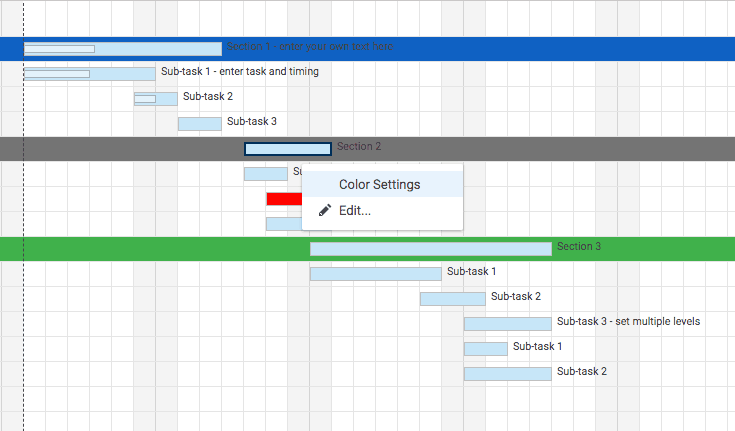
18. A color palette will appear. Select the color you want to change the bar to.
19. If you want to apply the same color to multiple task bars, hold down the Shift button on your keyboard and select all the bars. Then, release the Shift button, right click on any of the selected bars, and click Color Settings.
20. Proceed to change the color, based on your needs.
21. Continue to add dates and tasks, customize the chart, and input dependencies, milestones, and predecessors to better show your project and its corresponding tasks in a visual manner.
1
How To Create A Basic Gantt Chart In Excel
Source: https://www.smartsheet.com/blog/gantt-chart-excel
Posted by: rickerwhimere.blogspot.com
0 Response to "How To Create A Basic Gantt Chart In Excel"
Post a Comment